Showing posts with label baby. Show all posts

February 19, 2014

Sweet Home Chicago Baby Blanket


This has to be one of the easiest blankets I've made, and also the most popular.  I made my first one a few months ago while planning to make a collection to sell at a store in Chicago.  As I got busier and busier studying, then working, all while searching and applying for a full-time nursing position I didn't seem to be accumulating as many items to sell as I had hoped.  Between giving items to loved ones and making presents for the holidays I didn't seem to have extra time and yarn to spare for my little collection.

So a few weeks ago I decided that someone should be appreciating it either way and gave it to my dear friend and Chicago-native, Stacey.  She absolutely loved it and posted a picture to Facebook.  This led to a commission for a friend of hers to give as a baby gift.  And while exchanging the blanket in a nearby Starbucks, the woman next to us asked for my information to order one as well.  This baby is taking off!  


And of course it's a popular one, Chicago is a very unique place.  Although every city has love for their home and pride in the struggles and accomplishments of their home, Chicago has a fierceness in their loyalty.  You only need to watch two minutes of the local news to realize it's not the easiest place to grow up.  The weather is hot and muggy in the summer, cold and snowy in the winter.  It's not particularly forgiving. But for all those negatives, it forms strong and powerful communities.  

For us, it's been through Joe's rugby team.  They are as diverse a group as you can get- in age, race, occupation, and financial situation.  Yet not only do they come together to play as a team, they invest in their community by coaching local high school teams, helping each other find jobs, and encouraging their success.  They help and look out for not just each other, but their community as a whole.  It's amazing to be a part of this team. 

And though I would love to say that we are exceptional as a group, I don't think that's true.  I think you can find this community commitment throughout Chicago, whether you live North, West, or South.  We have only lived here for 2 years, but we've been welcomed into our community in so many ways- by rugby, by our neighbors at block parties, by friends we met through school.  Chicago has truly become a home.


Not to mention, Chicago brought us to our favorite Chicago-born dog.


Let's take a look at what that flag represents.  The white bars are the North, West, and South sides.  The blue stripes represent Lake Michigan and the north branch of the river for the top, and the south branch of the river and the canal for the bottom.  Each star represents a historical event in Chicago:  For Dearborn, the Great Chicago Fire in 1871, the World's Colombian Exposition in 1893, and the Century of Progress Exposition in 1933-1934. Within each of those stars, the six points also denote a point of pride related to the star's focus, ranging from their Latin motto "urbs in horto" (city in a garden) to values like Justice and Beneficence.


Keep reading to find the patten to make your very own Chicago blanket, or buy one here from my Etsy store!

The Pattern:

For the base blanket, I chained the desired width of the blanket.  The stitching is just a single crochet in each stitch, with a chain at the end of each row when you turn.  Super easy!  You can always shake it up by using a different stitch to make a more interesting pattern.

Dimensions: 

Each blue stripe is 1/6 of the height of the blanket, the middle white stripe is the height of two blue stripes.  I made my blanket about 36 inches wide and 24 inches high, making it a 2:3 ratio of height to width.  If you make yours a different size, just take your width as you crochet it, divide by 3 and multiply by 2 to get your full height.  Divide that by 6 to get your ideal stripe height.  For a 36" wide blanket, the stripes are 4" high.


The Stars:


Ch 6 into a magic ring to start.  

Round 1:  make 2 sc in each stitch, sl st into last stitch (12).  

Round 2:  Ch7, sc into 2nd stitch from hook.  In next five stitches, sc, hdc, hdc, dc, dc.  Sl st into 2nd stitch from where chain began, skipping one of the stitches.  Repeat until you have 6 points. Bind off.


Make 8 of these stars.  Evenly space 4 on each side and tack top and bottom point in place.  Line up the remaining four stars and tack in place on the opposite side.  I did this using a piece of yarn that I tied through both sides, and then removed once I stitched.  You could also tack with a permanent knot or temporarily with a marker.  Then stitch around perimeter of star, lining up both sides.


I hope you enjoy this pattern!  You can find it on Ravelry here.

Feel free to follow us on Facebook for updates on new posts and updates on baking, cooking, crafting, and more.


September 01, 2013

Sully's Knit Baby Bloomers

Our dear friends Stacy and Brian have what I believe to be definitively the cutest baby in the world, and his name is Sully.  As I probably have a decade before I want to create my own youths, I get to take out all of my pint sized crafty endeavors on him.  So far, they seem to be tolerating it pretty well.

One thing that I really like about little Sully is that he spends a great deal of time wearing only his diaper.  I mean honestly, I think most people would just wear their underwear if they could get away with it with no judgement.  Chicago in the summer is unbearably hot and humid.  Plus, if you already have to bathe your baby and he's only going to get food and spit up on everything why bother washing clothes too?

I figured that such a suave shirtless bachelor could use a little something to shake up his wardrobe without having to inhibit his manly cuteness.  And thus, this diaper cover was created!  For those special occasions when you can pull of shirtless-ness but want to class it up beyond the standard diaper.  Bonus points: it's Chicago Bulls colors.


You'll Need:

2 skeins of yarn in contrasting colors
3.25 mm/ size 3/ size D knitting 16" circular needles
DPNs


I used size 5 DPNs for the legs, as that's all I have, but the same size as the body would be ideal.
I used Caron's Simply Soft yarn.

The Pattern:

The Body:

Cast on 90.  Work in the round until you have about 5 inches, or your desired length from top of thigh (keep in mind the waistband will add to that height too).

To start the leg holes:  bind off 5 stitches, knit 40, bind off 5 stitches, knit 40, turn work.

At this point, we will be knitting a band out of one side.  The other side can be transferred to another needle, kept on your circular needle, or put onto a piece of string or other holding device for the time being.  I kept mine on the other side of my circular needle as it seemed the least work.

On purl side, bind off 1, purl across, turn work.  
On knit side, bind off 1, knit across, turn work.

Now we're going to do ribbing for between the legs.  If you opt not to, just continue to knit and purl until your desired length.  The ribbing gives you more flexibility with how big their diaper is.  If you used a different number of stitches, adjust the ribbing as needed to keep it symmetrical.

On the knit side: k5, p2, k3, p2, k3, p2, k4, p2, k3, p2, k3, p2, k5  (38)

On the purl side: p5, k2, p3, k2, p3, k2, p4, k2, p3, k2, p3, k2, p5  (38)

Repeat this ribbing until the thigh holes are the desired size.  Mine was about 9.5 inches long.  Stop when you're about to do the knit side.

K1, m1r, knit across until you have 1 left, m1l, K1, and turn.

If you're unfamiliar with m1r and m1l, they're a way to add a stitch that I explained here.


Merging the Body:

Starting a purl side row, turn the whole body to face the purl side and line up both sides.  Using a crochet hook if you have one, or another knitting needle, purl through a stitch on both sides.  Bind off as you go.  


bloomers inside out prior to seam 


 when seaming, purl through both front and back sides


 finished stitch

 binding off as you go


finished seam on the inside 


seam from the inside 


seam from the right side 


Leg Holes:

For the leg holes, use a contrasting yarn to make a ribbed ring.  

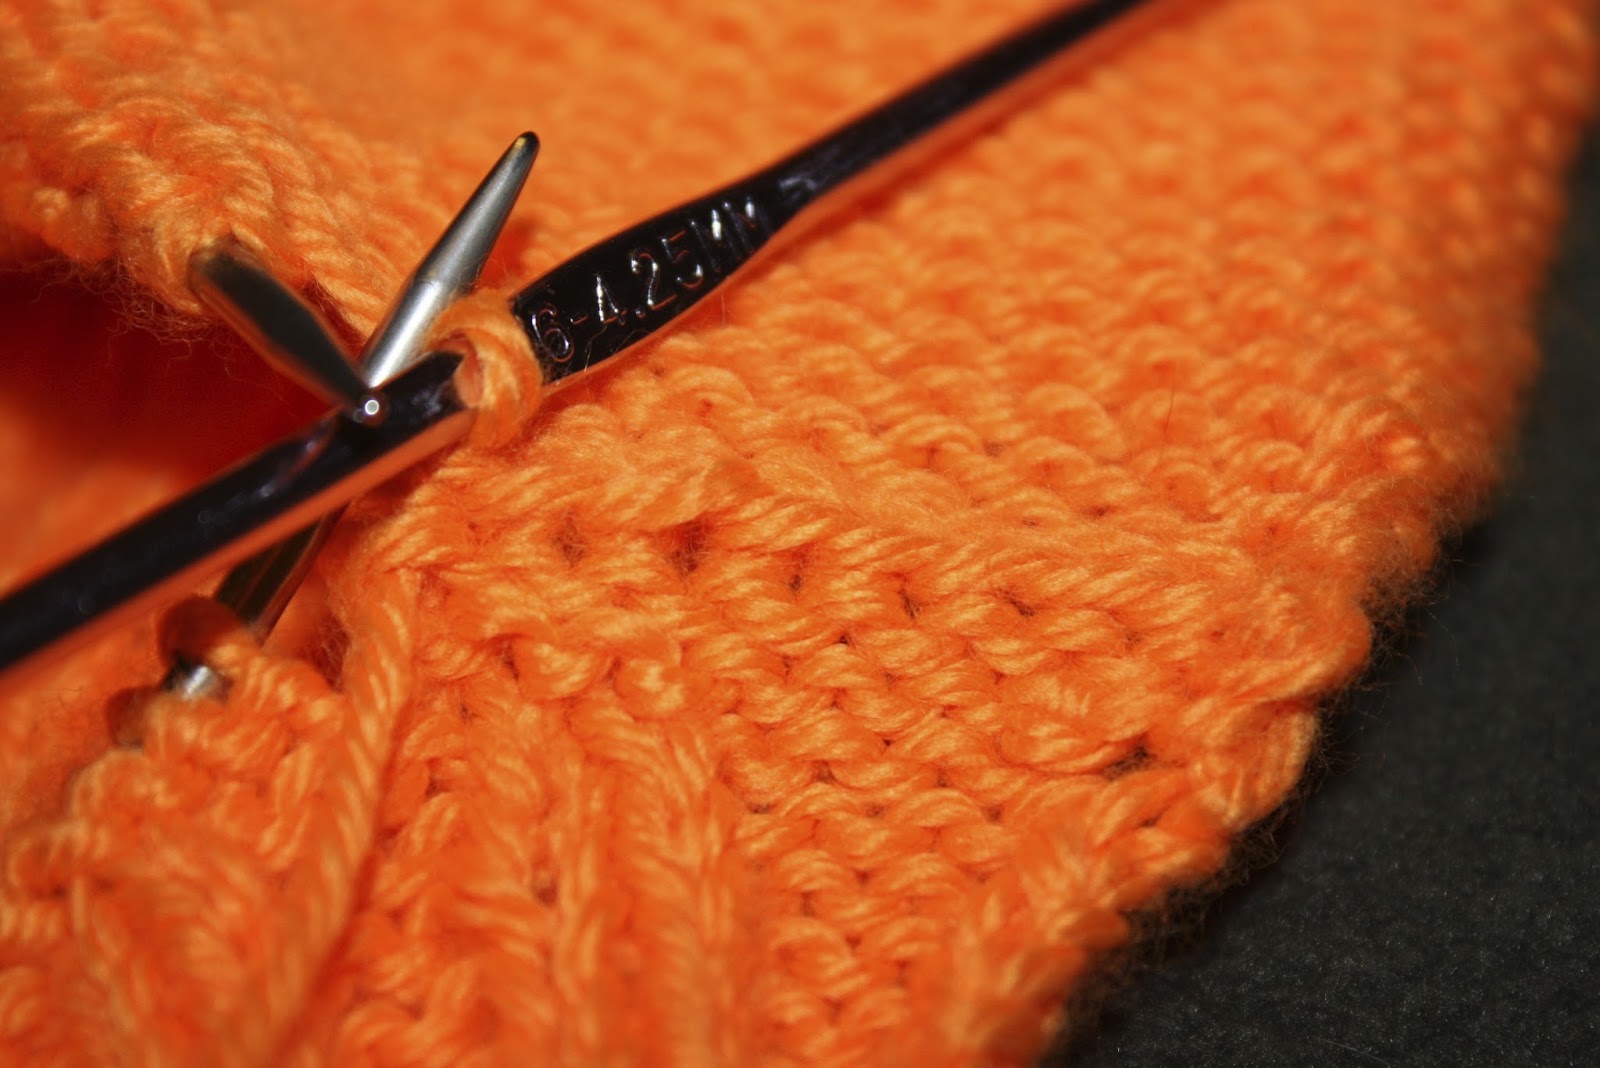
I used a crochet hook to pull up loops of the contrasting color one stitch in, and every other stitch apart. I then transferred these to DPNs.  If you don't have a crochet hook, you could pick up stitches to bind to using your DPNs, but it might look a little different, and possibly not as neat in the finished product.


 Make sure you have an appropriate number for the ribbing you do.  I did 2x2 (i.e. knit 2, purl 2), so I made sure my total number was divisible by four.

Continue the ribbing- in my case k2-p2- in the round until you reach your desired length and bind off loosely.  Mine were a little longer than 1 inch.

Repeat with the other leg.


For the waistband, use the same method as used on the legs to create loops several stitches below the top.  As before, make sure your number of stitches is divisible by the number of stitches in your repeated pattern.

I used 2x2 rib on the top as well, for about 2 inches in height.


Waistband Tie:

For the tie, I made an i-cord two stitches wide.  Weave this through the waistband.

This is optional, but it's cute, and will help keep your bloomers on if it's not exactly the right size.


And that's it!  Please let me know if you have any questions.

My final product is about 11 inches tall and 9.5 inches wide when laid flat.  
The gauge is 4.5 stitches wide and 6 stitches tall in a 1 inch square.


 a little size comparison


the backside


 the ribbed bottom


On a side note, while researching patterns I found of that people actually call these "soakers", which is weird and kind of gross.  I like "bloomers" much better, so we're going with that.


P.S.  This pattern is now up on Ravelry.

April 10, 2013

Knit Hexagons


I have this thing where I don't buy knitting or crocheting patterns.  I don't understand why I should pay for one when there are so many amazing patterns for free on the internet.  I get really irritated when I find an adorable picture, click on it, and find out they want me to pay $5 for it on Etsy or Ravelry.  It usually ends up in a little bit of cursing like a sailor as I attempt to peruse the World Wide Web for a comparable version that's free. And 9 times out of 10 I find one.  Or at least one I can alter enough to make it work.

It's not just that I'm cheap.  And for Pete's sake I'm in graduate school and am living off of loan money so I seriously need to be cheap. It's also that I don't understand why a PDF should cost that much money.

Those 1 out of 10 times when there is no better alternative I get super disappointed.  But I haven't given in yet and I am damn stubborn, so I'm thinking I'll hold out until my pattern-making skills catch up to my desires.  My inner biologist is obsessed with realistic animal stuffed animals (like this iguana) on PlanetJune and by jove one day I will make my own.

Just this week I was riding home from school and sat next to a lady knitting something itty bitty, so I asked what she was making.  She told me all about these little stuffed hexagons (or "hexipuffs") she was making from scraps and how they very neatly get put together to make a puffy little quilt.  I have tons of scraps! and I love projects I can do in class or on the train! Perfect!


But then I came home and found it on Ravelry and realized that the very cute Beekeeper's Quilt pattern costs $5.50.  I got very grumpy and spent two days mulling over whether it was worth buying it.  Was this pattern really worth caving in for?  And seriously, over $5?!  It's very small and simple.  Plus from what I read on the few blog posts I read (there are hundreds) many people ended up modifying the cast on, the increase/decrease, or the bind off.  I'm definitely not paying it if I'm going to have to change it anyways.

So my decision was made- I was going to make it up.  And if I'm  making it up then I can change it!  So I made mine a little bigger so that I can make fewer of them. Because 450 of those little buggers for just a lap blanket is insanity.  It should be easily changeable for those who want to make it smaller or bigger.


April 08, 2013

Modern Bobble Baby Blanket

I was hooked on baby blankets this past winter.  This one was actually made a few months ago for one of the cutest babies around, and I have finally found time to post it.   This ended up being more long and skinny than I intended, because I ran out of yarn, but I'm still pretty happy with the final product.


Also, this is not my original pattern, just one that I found online and loved.  It came from Moogly Blog, and was called Blackberry Salad Striped Afghan, for the bright colors they alternated between.

For my version I opted to do a more modern take and use high contrast colors.  The yarn is Loops & Threads Impeccable Solids in Chocolate and Aran.


Plus, all those little bobbles seem fun for little grabby baby hands.


March 10, 2013

The Simple Ripple Blanket

My grandmother is the queen of these blankets.  Each grandchild gets a full-size blanket in their college colors before they start their freshman year.  I've still got my red and white one in my bedroom here in Illinois.

I wanted to try out a new pattern for the baby of a friend of mine, and it seemed like the perfect one to try since it means so much to me. I found some similar patterns but they were annoyingly complicated.  I decided to make up my own pattern where there's only one pattern to remember that's the same for every line.  It's also really easy to adapt to the size you want to make.


February 26, 2013

Modified Stockinette Snake

 I studied biology in college, and totally love (almost)  all things creepy crawly- snakes, frogs, and beetles being my top three.  I even spent a year of college doing research on South African Clawed frogs, and spent a lot of my free time abroad in East Africa looking up insects that I found around camp.  My mom would tell you I've been like this pretty much forever.  I remember once thinking I was ingenious in using a bubble tape gum container to hold my ants so I could bring them inside to play with them and not soon after was shocked to find it empty. Sorry mom!

Joe and I are even the proud owners of not one, but two snakes.  I have a very scared and wimpy ball python named Bruce, whose an absolutely gorgeous pastel morph for those of you who know what that means.  Joe's is a larger iridescent Imperator Boa.  If anything Joe is even more into herpetology than I am, so I am lucky to have found someone equally weird.


So now you can understand how totally thrilled I was when I found this amazing pattern for a knit snake on purl bee! (Which, as a side-note I am really hook-on right now, so there will be more modifications coming your way).

The recipe calls for making it striped with two kinds of yarn, but because I'm impatient as all get out and because I had a yarn that had some built-in stripes I modified it for just one color.  I used an old skein of Caron Simply Soft Shadows that I had around, but I'm not sure they make it anymore. As for the needles I used, they're from my grandmother's collection, and I don't have the faintest clue what size they are.  You could use DPN's instead easily.

Here's the best part of this project:  it's knitted flat!  And you don't have to do any seams or merging or stuffing or anything.  It uses the basic stockinette stitch (knit one side, purl the other) and just naturally curls into itself to make itself round!  It's amazing and SUPER easy.  If you're someone whose only ever done scarves and knitting and purling you could do this!


February 23, 2013

Toddler Moccasins

Let me start this with the caveat that this is my first time writing out own pattern.  I do a lot of altering other people's patterns and making things up without worrying about writing it down, so this is totally new for me!  So if you have any constructive criticism or advice on making this easier to follow I would love hear it.


Supplies Used:

3.5 mm hook

Loops & Threads Impeccable yarn
    in Chocolate and Aran
    (or any other thick, worsted yarn)

Abbreviations:
ch: chain
sc: single crochet
hdc: half double crochet
inc: increase stiches by 1
dec: decrease stitches by 1
sl: slip stitch


February 17, 2013

Crochet Edged Fleece Blanket

This project is a super simple project that ends up looking fantastic.  All it requires is some crochet thread, some fleece, and a small sized crochet hook.

 I was inspired by a purlbee pattern for flannel receiving blankets.  purlbee manages to constantly be posting modern patterns based on traditional techniques that I find incredibly endearing.  This one is crochet edged flannel baby blankets.  I don't have a baby, but I do have a very drafty apartment.  I have some knit afghans but was hoping to make something a little warmer and fuzzier.  So after a little bit of internet research I found out that it is very doable to make this with fleece instead.  I picked out a cute midwestern patten for Oy and a basic heather grey for Joe and I.  I used Aunt Lydia's Fashion 3 Crochet Thread (but a thin yarn also works fine) with a 1.90 mm/ size 5 hook.

Fabric Prep: 


This part depends on the supplies you have, how much time you want to invest, and how particular you are.  The first step is to cut the edges to straighten them out and take off that weird not-fuzzy edge.  I also cut my corners to be rounded out of personal preference.

If you're very neat, you could fold the edges under twice, sew them there, and use what I believe is called a rotary punch or a hole puncher of some sort to cut holes about 1/2 an inch apart.

If you're not that fussy, so you can follow that I did, or pick and choose the parts you want to follow.  I pinned the edges as I went (folded over twice to the back of the work).

showing the back of the work, it if folded over twice and pinned

February 03, 2013

Constellation Baby Blanket

In the spirit of free hand crochet items, I thought I'd also post my very first attempt at totally making things up: a constellation baby blanket!

A friend of mine in nursing school is having a baby!  And given he frequency with which he wears space-themed shirts, I thought this would be the perfect plan.  I looked up a constellation map online, and found a portion that would be somewhat square.  I also wanted it to include my favorite constellation (Cassiopeia) and a famous one (the little dipper).  I happened to use August 2012.

Here's the final result:

And a closer look at eat of the constellations:

Cepheus 

December 11, 2012

Football Baby Cocoon

Holy Moly it's been a long time.  School picked up and I have many a project to post!

This is a project I did in early fall for a friend of our who just had a baby. I had seen an etsy listing for a similar hat and baby sack combo and being an inventive (read: cheap) person I have a hard time paying for patterns and an even harder time paying for something I think I could make myself.  So I made it up!  And all-in-all I think it came out pretty well.  It's on the small side- especially for our little one month old chubster- but it's a pretty dang good first try. All of the white stitching was added after with a crochet hook.


Unfortunately, I didn't write down my pattern, but I do have pictures!
(Please forgive the very dirty-looking ottoman underneath)